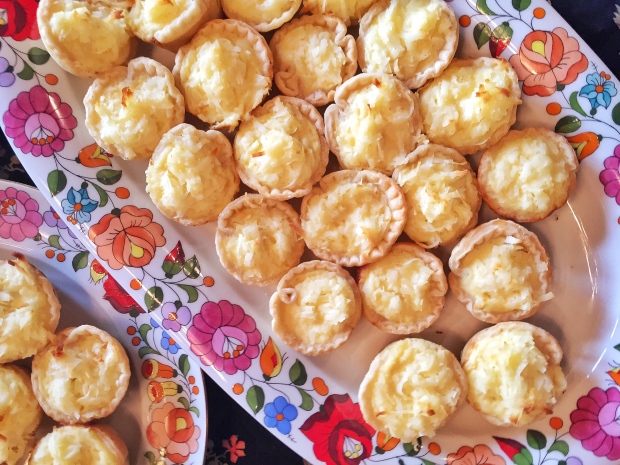
Coconut Custard Tartlets


FullSizeRender 6

More than any other activity, food is the guiding principal on Taylor Family vacations. A good majority of our days are spent battling discussing what to eat, where to eat it, and what each person will eat when we get wherever we’re going. We dissect our favorite dishes with the intention to reinvent them in our kitchen, using amateur detective skills to debate questions like

who thought to put pears inside a pasta and can you please draw me a bath made of this sauce?

a taco shack! we have to stop! fish tacos FTW! what is that spice?

can you remember the name of that place without a sign in a Roman alley where we ate the best cacio è pepe of our lives eight years ago?

who invented this butterscotch pudding in a teacup / where can i get the recipe / is the inventor available for marriage?

The mother recipe from which these tartlets were born, a coconut custard pie, follows this pattern. Everyday lunch on my parents’ favorite Caribbean island is a celebration of local Antiguan fare and includes freshly-caught fish, garden vegetables, and coconuts from the palms that envelop the property. My mom loved this pie so much that the pastry chef sent her the recipe.

While I don’t have a tree in my backyard to shimmy up and harvest a few coconuts for tonight’s dessert, sweetened coconut works just as well here. Since it’s not seasonal, these tartlets will transport you to a tropical island far, far away — specially if it’s 15 below zero during an east coast winter — if only for a bite or two.

Coconut Custard Tartlets (adapted from Mark Smith, pastry chef at Curtain Bluff)

1 pie crust (Unfortunately for you, I’m taking my pie crust recipe to the grave. Try this one.)

1 lb sweetened shredded coconut

3 eggs

1 cup heavy cream

1 cup milk

kiss of vanilla extract

Preheat the oven to 350 degrees. Spray a mini muffin tin with cooking spray.

Whisk coconut, eggs, cream, milk, and vanilla extract together in a bowl. Set aside.

Roll out your pie crust until to approximately 1/4-inch thickness, re-rolling the dough as necessary. Using a circular cookie cutter or a small glass, cut rounds out of the pie crust. Press each crust into the muffin tin and spoon ~1-1 1/2 tablespoons of coconut mixture into each cup.

Bake for about 30 minutes, or until tartlet crust is golden brown. Leave tartlets in the muffin tin allow to cool on a cooling rack for 10 minutes. Top with a dollop of slightly sweetened whipped cream (or coconut whipped cream!) and serve.
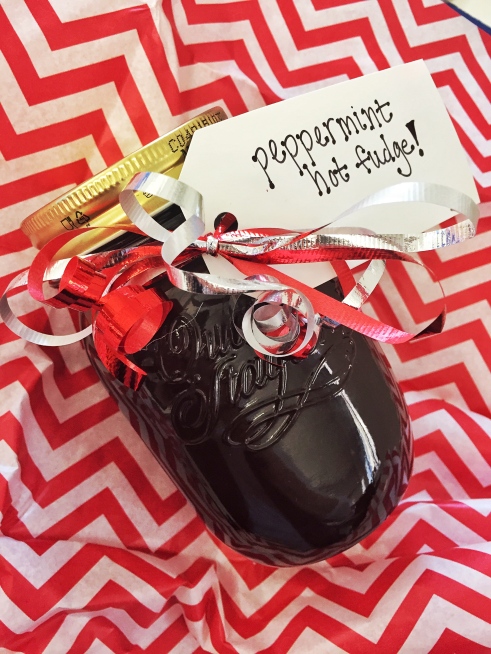
Peppermint Hot Fudge


FullSizeRender 2

A+ homemade holiday gift

As far as ice cream toppings go, I always fall back on the 1950s diner-style sundae toppings: whipped cream, 8-10 maraschino cherries, the occasional handful of crushed nuts, and always, always hot fudge.

There’s something magical about pouring molten chocolate over cold ice cream and the instant Bon Appétit cover-worthy tracks the sauce creates. The chewy chocolate is the perfect compliment to soft ice cream, especially for someone who is obsessed with texture differentials in their food. Plus, there’s never day too cold for ice cream.

I’ve dabbled in hot fudge and been thwarted by its inherently finicky nature. Grainy fudge, seizing fudge, burnt fudge — I’ve experienced it all and cursed the dessert Gods. Then, this recipe came along and I thought it was too good to be true! I promise, this version every bit as good and simple as it seems, even if you don’t consider yourself a baker. With a gift like this, you’re bound to be the envy of your work White Elephant or your Tinder date’s holiday party this season.

Peppermint Hot Fudge (adapted from Smitten Kitchen)

Makes approximately 2 cups

2/3 cup heavy cream

1/2 light corn syrup

1/3 cup dark brown sugar, packed

1/4 cup unsweetened cocoa powder

1 cup bittersweet chocolate chips, divided

1/4 teaspoon salt

2 tablespoons unsalted butter

1/4 teaspoon peppermint extract (or to taste)*

In a medium-sized heavy saucepan, whisk together cream, syrup, sugar, cocoa, salt, and half of the chocolate chips. Bring to a boil over medium heat, then reduce to a low simmer and cook for 5 minutes, stirring occasionally. Remove saucepan from heat, add butter, the second half of the chocolate, and the peppermint extract. Stir until butter is complete melted and fudge is smooth. Transfer to a glass bowl to cool and thicken, then put into jars or another sealable container. Will keep in the fridge for up to 2 weeks.

*You can sub in vanilla extract for the peppermint to make this a any-time-of-year gift!

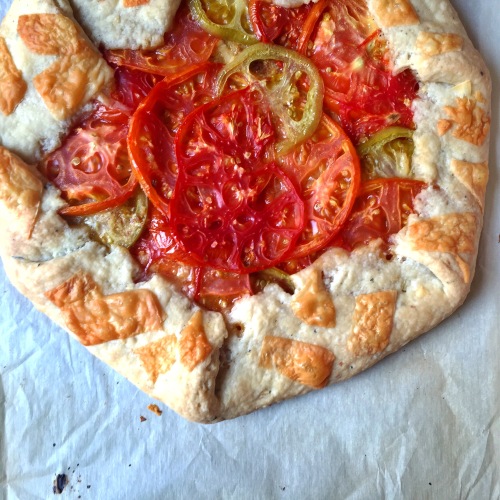
Heirloom Tomato Galette

stunning, right?!

stunning, right?!

I read recently that tomatoes are basically not worth eating unless they’re home-grown over the summer and eaten August.

Support.

There’s just something those about sun-warmed, ocean air-sweetened, soil-gritted, garden-harvested tomatoes that screams summer. Unfortunately, it also screams end of summer. Luckily for us, summer doesn’t technically end until for another five days and it looks like global warming will afford us at least one more mid-80 degree weekend so we can relish in the beauty of these delicious little orbs for just a bit longer.

Run out to your garden or hit your local farmer’s market this weekend and snag every tomato you can carry. Whip this galette up for a cocktail hour appetizer. Serve alongside a handful of arugula tossed in lemon and olive oil and transport your mind to the Tuscan countryside or a Parisian café. Throw a fried egg on top for breakfast. Make your own rules, just savor those end-of-summer-tomatoes.

Heirloom Tomato Galette (adapted from Spoon Fork Bacon)

for the cream cheese crust

1 cup all-purpose flour

1/4 teaspoon salt

1/8 teaspoon baking powder

6 tablespoons unsalted butter, cold and cut into small cubes

1/4 cup (2 oz) cream cheese, cold and cut into small cubes

2 teaspoons apple cider vinegar

1-2 teaspoons ice cold water

for the filling

ˆ4 oz grainy mustard (you can also use a soft cheese)

1/4 cup panko breadcrumbs, toasted

2-3 heirloom tomatoes, thinly sliced

to garnish

shaved parmesan

fresh basil or your favorite herb

sea salt

Preheat the oven to 400 degrees F. Combine flour, salt, baking powder, butter, and cream cheese in a bowl and mix with your hands until a coarse meal forms. Add vinegar and ice water and stir until all ingredients combine to form a dough. Move dough to a lightly floured surface and shape into a disc. Wrap in plastic wrap and refrigerate for 30-60 minutes.

When the dough is chilled, roll out into a 13″ circle on a lightly floured counter. The circle should be about 1/8-1/4 inch thick. Transfer dough to a parchment-lined baking sheet and spread mustard evenly over the crust, leaving approximately a 1-inch border.

Shake panko crumbs over the mustard and top with tomato slices, overlapping the tomatoes as you go. Fold the edge of the crust into the center and press gently to secure – this will ensure the good guts of the galette to stay put.

Sprinkle the crust with parmesan cheese and bake for 25-30 minutes, or until the crust is golden in color.

Remove from oven and allow your gorgeous galette to cool. Garnish with your favorite herbs, sea salt, and more cheese as you wish.

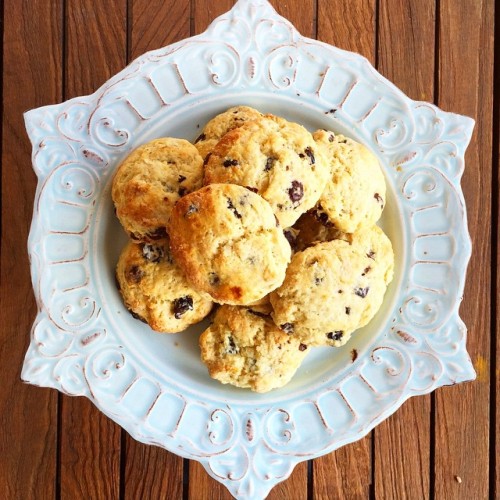
Tart Cherry + Dark Chocolate Scones

pretty things on cake plates

pretty things on a pretty cake plate

For the first six weeks of the year — deep the doldrums of winter — I spend a substantial amount of time wondering why I ever traded endless summer in LA for grey day after grey day, snowstorm after seemingly perpetual snowstorm.

It has gotten more difficult to tear myself from my cozy flannel sheets every morning. Sleep at night is fitful at best, I hit my snooze button no fewer than six times instead of my normal (and appropriate) two or three. I feel like a skeletal, pencil cartoon of myself walking around with a giant thundercloud over my head. I don’t like myself all that much and I can’t imagine I’m all that fun to be around.

Then, one day, brilliant sunshine breaks through the clouds and everything pivots. The snow starts to puddle and the frozen block in which my heart has been contained for the last few months starts melting, making room for the newness that comes with spring. I feel the light seeping back in, frenetic energy dissipating. My parent’s black lab showers me the only way he knows how – with unconditional love. I find the energy to turn that love into my favorite pastry, filling the house and my heart with happy aromas of my favorite bakery in my favorite place on earth. `

Tart Cherry + Dark Chocolate Scones (inspiration drawn from the Nantucket Bake Shop; recipe adapted from Epicurious)

2 cups flour

1/3 cup white sugar

1 teaspoon baking powder

1/2 teaspoon salt

7 tablespoons unsalted butter, chilled + diced

2/3 cup buttermilk, chilled

1 large egg yolk

1 teaspoon vanilla extract

3/4 cup dark chocolate chips

3/4 cup dried tart cherries, coarsely chopped

2-3 tablespoons milk

2 tablespoons raw sugar

Preheat oven to 400 degrees F. In a large mixing bowl, sift dry ingredients — flour, sugar, baking powder, and salt. Add butter and mix together until the mixture resembles small pebbles. Whisk together buttermilk, egg yolk, and vanilla extract; add wet ingredients to dry ingredient and bring ingredients together with a fork to form a loose dough. Add chocolate chips and cherries, kneading to incorporate.

Gather dough into a ball and press out into a flat round on a lightly floured countertop. Using a biscuit cutter or upside-down drinking glass, cut out scones. Repeat with excess dough until everything is used. Place scones on parchment-lined baking sheet. Brush with milk and sprinkle with sugar. Bake for 12-15 minutes. Best served piping hot out of the oven, no accoutrements needed.

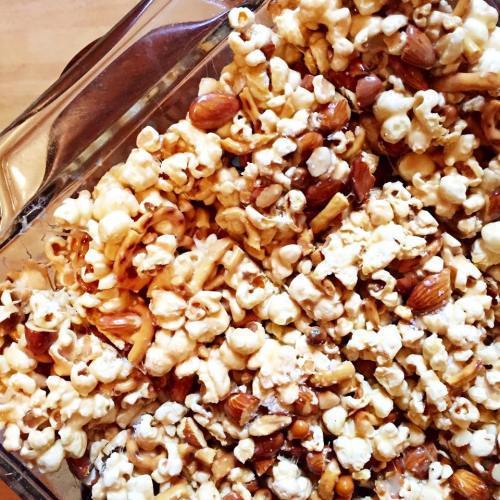
Caramel Popcorn Bars

caramel popcorn crack

caramel popcorn crack

Popcorn — I’m talking stovetop popcorn here, get that microwaved nonsense out of my face* — is a severely underrated snack.

It’s quick and easy to make, (relatively) healthy, cost-effective, and versatile. All it takes is a pot, olive oil, kernels, kosher salt, and a bowl. Hella impressive sorcery right there.

My dad is the popcorn master. He instilled in us a love for the snack very early on, and continues to make a massive batch of it every time we’re home whether it’s for a movie marathon or football playoffs. It doesn’t matter if two or five of us are home, the quantity of popcorn rarely varies and the bowl always, always disappears in a matter of minutes.

Generally, I like my snacks to hit both sweet and salty notes so these caramel popcorn bars are right in my wheelhouse. Elevate your party snacks, bring leftovers to work, and bask in your baking prowess.

*While I think the world would be a better place if microwaved popcorn disappeared entirely, Tinder prospects take note: you best be prepared to share popcorn with me on a movie date. No butter. Also, something chocolate.

Caramel Popcorn Bars (adapted from Shutterbean)

cooking spray

1-2 tablespoons olive oil

1/2 cup popcorn kernels

3-4 cups pretzels, roughly chopped

1 cup toasted almonds, roughly chopped

1 cup mini dark chocolate chips (optional)

2 cups sugar

1/4 cup water

2/3 cup heavy cream

1 teaspoon kosher salt, + more for sprinkling

2/3 cup mini marshmallows

Spray a glass pan with cooking spray and set aside.

In a large pot (preferably one with two handles), heat olive oil over medium heat. Add popcorn kernels and cover with a lid. Using oven mitts, swirl popcorn around periodically until kernels begin to pop. Leave covered over the heat until popping slows down, approximately 2 minutes. Carefully remove the lid to let the steam out. Put popcorn in a large bowl and set aside.

Add pretzels, almonds, and chocolate chips to bowl with popcorn. Toss together until mixed evenly.

Add sugar, water, and salt to a large saucepan. Boil over medium-high heat until caramel forms. Watch closely — while a watched pot never boils, boiling sugar will turn quickly to molasses if not monitored (I did this).

Remove pan from the stovetop and slowly add cream – the caramel will bubble up and nearly overflow. When the caramel settles, add marshmallows and stir until melted.

Spray a rubber spatula with cooking spray. Pour caramel over the bowl of salty snacks and toss together with spatula until evenly coated. Dampen your hands with water and transfer the popcorn to glass dish. Press popcorn into the pan and sprinkle with additional kosher salt. Allow to cool before you cut into squares. Try to save some for your friends (it’s difficult).

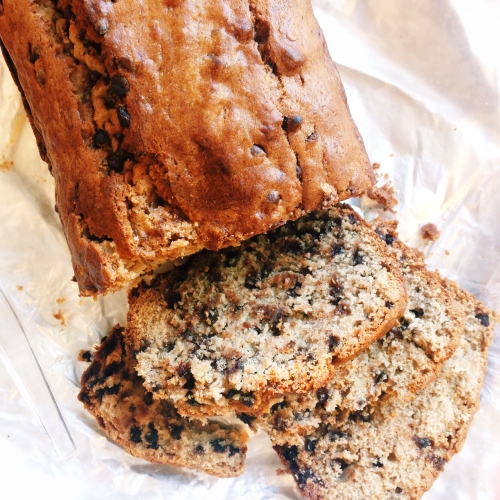
Chocolate Chip Banana Bread

the perfect banana bread

the perfect banana bread

If my dad’s pancakes are emblematic of childhood Saturday mornings donning an A+ bed-head and cozy slippers at the breakfast table, then my mom’s banana bread will always propel me back to those school days when I was an angsty pre-teen and never wanted to wake up.

[I’d like to think that I wasn’t actually all that angsty of a 13-year old and I always jumped out of bed when my mom came to wake me up in the morning. I also feel like that’s probably not the case, but I’ll leave that up to her to recall (…Mama?).]

Getting out of bed aside, weekday breakfast for the elementary + middle school Taylor girls varied between cereal + fruit, hot cereal or oatmeal, and hard boiled eggs + banana bread on special occasions. Leaving the house without eating breakfast was non-negotiable, a habit that has (luckily) carried over into adulthood. The hard boiled eggs + banana bread days were my favorite.

Most of my friends know how much I abhor bananas. The texture, the aftertaste, and the sound bananas make while chewing are like nails on a chalkboard for me. Want to torture me? Stick me in a car with someone eating a banana. Yes, yes, I know about the nutritional benefits but everyone has their thing, and bananas are mine.

Banana bread, though, is a completely different story. I could eat an entire loaf of this thing without pause. I don’t know if it’s because of nostalgia or what, but this bread hardly tastes banana-y and is just the perfect amount of sweetness for pre-breakfast, second lunch, afternoon snack, or midnight dinner, and all meals in between. I throw chocolate chips in because it’s a fact that mini kisses of chocolate make everything 100000x better. Also, adulthood.

My favorite part of this recipe by far, however, is the cookbook in which it lives. When I scan the cookbook shelf at my parents’ house, I can hone in on the red-and-white grid cover immediately. It opens right to this recipe, the page stained with 26+ years of grease and use, caked with flour and love. It’s fun to think about my mom baking in the early morning hours prior to school while visions of breakfast danced in our heads.

Chocolate Chip Banana Bread (adapted from the Silver Palate Cookbook)

1 stick (8 tablespoons) unsalted butter

3/4 cups brown sugar

2 eggs

1 teaspoon vanilla extract

1 teaspoon baking soda

1/2 teaspoon salt

2 cups flour

3 large ripe bananas, mashed

1 cup mini semi-sweet chocolate chips

Preheat oven to 350 degrees. Grease and flour a loaf tin or bundt pan and set aside.

Cream butter and sugar together until fluffy. Beat eggs into butter + sugar mixture one at a time. Add vanilla, baking soda, and salt. Sift flour into wet ingredients until just incorporated. Add bananas and mix thoroughly. Fold in chocolate chips.

Pour batter into the pan and bake for 50-60 minutes or until a toothpick comes out cleanly. Cool for 10-15 minutes before transferring to a cooling rack.

Slice and serve alongside milky tea or strong coffee.

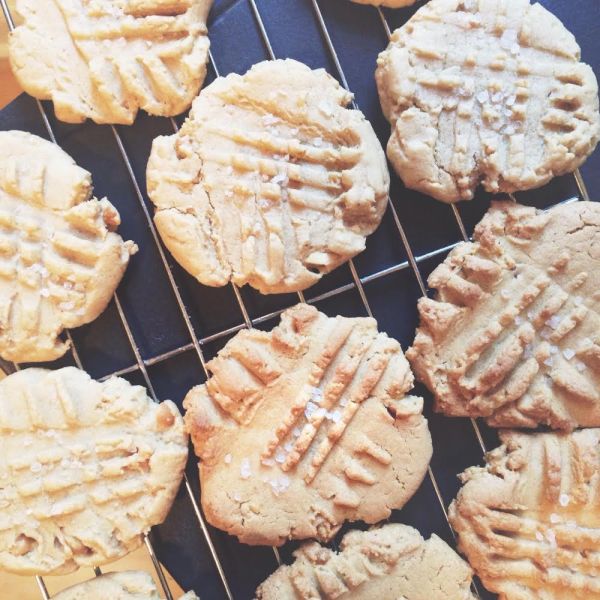
Peanut Butter Cookies

peanut buttery-ness

peanut buttery-ness

For a self-proclaimed sweet-tooth, I’m rather particular about my desserts. I hardly ever order dessert at a restaurant, I never prefer candy, and most of the time I pass up sweets in the office unless I brought them in. I can be found eating dessert in one of two ways: 1) my sisters swirling slightly too much whipped cream directly into my mouth only to snort it out ten seconds later because one of them made me laugh, or 2) standing next to the oven shoveling too-hot, barely baked cookies into my mouth and subsequently burning all nerves into oblivion.

These cookies were born out of a momentary panic on Sunday when with an exclamation of “AHH I have nothing to take to my friends apartment when we go watch the Giants game in 30 minutes!” followed closely by a “UGH I don’t have any chocolate chips to make their favorite blondies!” After staring into my cupboard for .4 seconds, I grabbed the jar of peanut butter hoping I’d be inspired through osmosis. Then, Hark! I remembered that my sister, who has a [strange] aversion to chocolate, made these recently and they were devoured seconds upon removal from the oven.

The peanut butter cookies here bake up rather quickly. In fact, I like to take them out a minute or two prior to the suggested baking time so they retain their chewiness. I have great visions of stacking these little guys up in cellophane bags and tying them off with über-atumnul ribbon to dole out to unsuspecting friends on a rainy fall day.

Peanut Butter Cookies (adapted slightly from Joy of Cooking, via Disgustingly Good)

1/3 cup (5 1/2 tablespoons) unsalted butter, softened

1 cup packed brown sugar

1 large egg

1/2 teaspoon vanilla

1 cup peanut butter

1/2 teaspoon baking soda

1 1/2 cups all-purpose flour

2-3 tablespoons sea salt (optional)

Preheat the oven to 375 degrees. Grease or line 2-3 baking sheets and set aside.

Cream butter and sugar together in a large bowl. Add egg, vanilla, and peanut butter and mix thoroughly until combined. Stir in baking soda and flour until a dough forms.

Scoop the cookie dough out in 1-inch rounds and place them on a baking sheet approximately 2-inches apart. Press dough with a fork twice — once each way — to achieve that “classic” peanut butter cookie aesthetic. If desired, sprinkle a pinch of sea salt on each cookie.

Bake cookies for 8-10 minutes. Remove from oven and allow to cool for 1-2 minutes before transferring to a cooling rack. Do your best not to singe your taste buds.

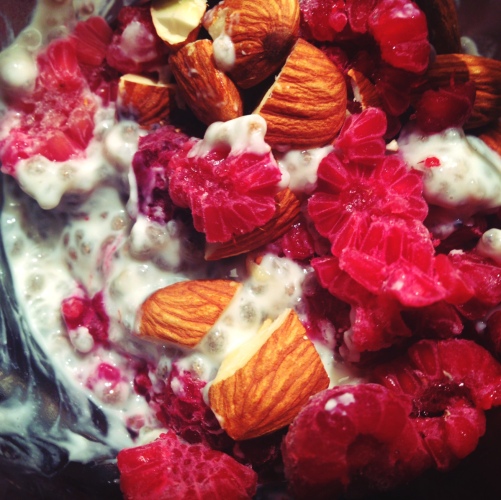
Vanilla Chia Pudding

chia goodness

chia goodness

Like most 90s kids, I most closely associate chia seeds with this. Spread some chia seeds on this terra cotta animal and violà! Your very own [creepy] grass pet. I happened to be partial to Beanie Babies, but hey, if you’re in to that thing, to each her own.

Chia seeds are the new black in New York right now. I’ve seen them in salads, smoothies, oatmeal, and yoghurt. They boast benefits such as enhanced hydration, lower blood pressure, reduced food cravings, and Omega-3 potency. If they spill on your counter, you might freak out and think they’re little bugs. Generally, though, they are a great enhancement to your everyday snack.

After about a month of living on the chia pudding from Liquiteria, it dawned on me that this was simple enough to create at home and has since become my favorite post-workout snack. It’s a super-easy, one-bowl recipe and could also be a great breakfast (with some granola for the Crunch Factor!) or healthier dessert. Added bonus: the flavor profile will impress the hell out of your friends.

Vanilla Chia Pudding (adapted from Giada)

1 cup unsweetened vanilla almond milk

1 cup plain Greek yoghurt

2 tablespoons pure maple syrup

1 teaspoon vanilla extract

pinch of kosher salt

1/4 cup chia seeds

1/4-1/2 cup sliced almonds, toasted

1/3 cup berries (optional)

Whisk together almond milk, yoghurt, maple syrup, vanilla, and a pinch of the kosher salt in a medium bowl until just combined. Whisk in the chia seeds and let the mixture stand for approximately 30 minutes. If seeds have settled, stir to redistribute. Cover with saran wrap and refrigerate overnight.

The following day, stir the pudding and taste. If you’d like it to be a bit sweeter, add a tablespoon of maple syrup at a time to reach desired sweetness. Spoon pudding into a bowl and top with your preferred accoutrements – sliced almonds and raspberries are my favorite. Serve and enjoy! Pudding will keep in the refrigerator for about a week.

Summer Street Corn

summer perfection

summer perfection

My family is big on superlatives. Everything is always “BEST SONG EVER” or “MOST INTERESTING FACT IN THE UNIVERSE” or  “GREATEST MARGARITA IN THE HISTORY OF ALL TEQUILA DRINKS” or “MOST WONDERFUL FRIENDS ON EARTH.”

You get the picture.

Sure, this kind of zeal is probably irritating to people who aren’t intimately involved with the Taylors, but I live for this enthusiasm. It has contributed to the highest highs and lifted me up from the lowest lows in my life. It’s the kind of passion that has the power to permeate a deflated spirit that comes with the most terrible-horrible-no-good-very-bad-day.

The passion shows through in my family’s cooking. Not in a corny way like I cry into a soup and everyone in the restaurant cries too, but I really love watching people eat food I prepare for them especially if it’s a group who makes me feel all warm and fuzzy inside. I spent the weekend cooking up a storm with my mom and we made an awesome menu comprised of this corn, fish tacos, papas fritas, and a banging kale salad. It was, if I do say so myself, the BEST MEAL EVER (or at least, of the summer thus far).

This street corn is a riff off of my sister’s favorite corn from a restaurant in Nantucket. Unfortunately, she missed it this time, but #humblebrag, I think it’s better than the restaurant version. It’s going to become a staple in repertoire and I see myself making it every time I have access to a grill this summer.

Summer Street Corn (adapted from Saveur)

6 large ears corn, with husks still attached

1 cup ricotta salata, grated

for the crema

2 cups mayonnaise

juice of 2 limes

1/4 cup ketchup

2 tablespoons vinegar from jalepeños en escabeche

salt & pepper to taste Preheat the grill to medium-high heat.

Fill a large bowl or pot with water. With the husks still attached, place ears of corn in water and soak for 30 minutes. While you soak the corn, make the crema. In a medium-sized bowl, mix together mayonnaise, lime juice, ketchup, vinegar from the japeleños en escabeche until combined. Add salt and pepper to taste.

Remove corn from water. Place corn on the grill for approximately 10 minutes. Remove ears of corn and peel back the husks one layer at a time, keeping the husks intact. Remove the silk and discard. Brush each ear of corn liberally with the crema. Transfer corn to grill to cook, turning occasionally. Grill corn for approximately 20 minutes until charred and cooked through. Sprinkle grated cheese directly on the warm corn and allow to melt. Best served alongside a massive margarita.

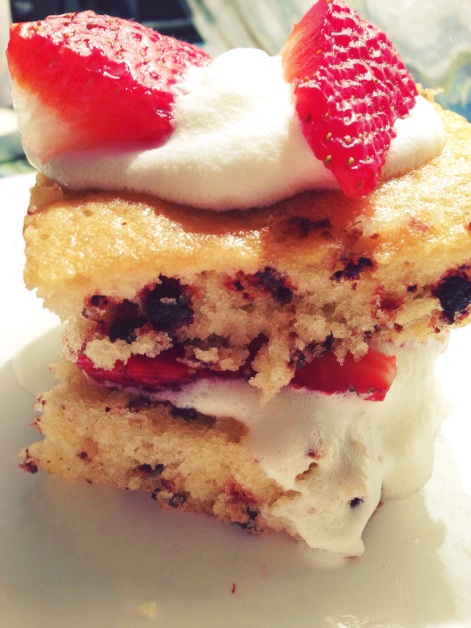
{Double Batch} Chocolate Chip Olive Oil Cake with Strawberries + Cream

leaning tower of goodness

leaning tower of goodness

For those keeping score, it is not warm yet in NYC.

Shoot.

As we wait ever so patiently (read: not patiently at all) for the longest winter ever to come to a close, the days of the week are getting curiouser and curiouser. They’ve been plagued with stomach bugs, workdays when you feel like you just can’t win, disappointing conversations, and harsh, reality-busting realizations. Luckily, the days have been conversely peppered with personal productivity, international travel plans, 30 Rock marathons, and insanely late weeknights traipsing around Manhattan because adulthood and #yolo.

After a weekend of both low lows and high highs, I couldn’t think of a better way to start the week than with a sweet and simple cake. The original recipe calls for the addition of cocoa powder to the batter, but I don’t prefer chocolate cake so I eliminated that element and added chocolate chips instead (Molly made the real version!). This cake is a really easy crowd pleaser (ask anyone in my office, they reaped the benefits of my Monday night baking), and is just as good completely plain as it is with strawberries and cream. It also makes for a great dessert, or even breakfast with coffee. AND it’s vegan if you sub the whipped cream for coconut cream.

Chocolate Chip Olive Oil Cake with Strawberries + Cream (adapted from Shutterbean)

for the cake

3 cups all-purpose flour

2 cups sugar

2 teaspoons baking soda

1 teaspoon coarse salt

3/4 cup olive oil*

2 teaspoons vanilla extract

2 tablespoons white vinegar

2 cups cold water

1 1/2-2 cups mini chocolate chips

for the filling

1 pint heavy whipping cream

1/4 cup powdered sugar

1 teaspoon vanilla extract

2 cups strawberries, sliced

*I enjoy the depth olive oil brings to a cake. For a more subtle flavor, sub in vegetable oil. 

Preheat the oven to 350 degrees. Grease 2 cake pans and set aside. If you don’t have a cake pans (like me for some odd reason), a square, rimmed pan works as well, and you can slice out individual cake squares that way.

In a large bowl, combine flour, sugar, baking soda, and salt and sir until mixed thoroughly. Make a well in the center of the dry ingredients and add olive oil, vanilla extract, vinegar, and water. Using a whisk or a wooden spoon (guess who doesn’t have a whisk in their apartment?! This girl. #amateurhour), mix wet ingredients with dry ingredients until a smooth batter is formed. Fold in chocolate chips until consistent throughout.

Pour the batter into the cake pans or square pan and bake for 30-45 minutes, or until a toothpick comes out clean. Allow to cool completely.

While the cake is cooling, whip heavy cream into soft peaks in a medium bowl. Add powdered sugar and vanilla until incorporated and slightly stiff.

If your cakes are round, slice the domed top off one of the cakes to make a flat surface and place on a serving tray. Top with whipped cream and place a layer of strawberries on top. Top these layers with the second cake round, add whipped cream and strawberries. Slice and serve.

If your cake was baked in a square pan, slice the cake like you would a lasagna. Split the square in half, add whipped cream and strawberries, top with other half. Add extra strawberries and whipped cream to the top. Proceed to inhale.

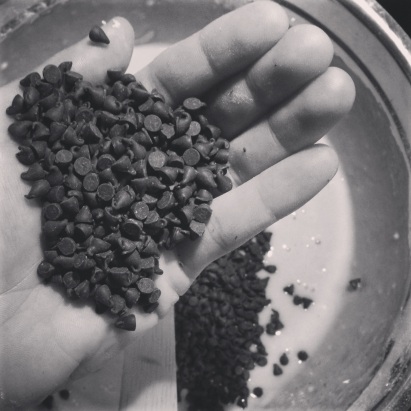
handful. it's a technical term.

handful. it’s a technical term.